
SSH & Local User Config 1
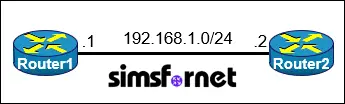
Topology
Tasks:
Physical cabling is in place, configure access control on the router.
- Create a local user on Router1 for authentication.
- Username: corp
- Password: support123
- Privilege level: Exec mode
- Enable SSH v2 on Router1 using RSA 1024 bits modulus and domain-name test.com.
- Restrict access on VTY lines 0-15 to SSH only and secure it with local user authentication.
- Verify SSH access to Router1 from Router 2.
Solution:
Task 1: Create a local user on Router1 for
authentication.
- Username: corp
- Password: support123
- Privilege level: Exec
mode
Router1#configure
terminal
Router1(config)#username corp privilege 15 password support123
privilege 15 assigns full administrative
(Exec mode) privileges to the user.
Task 2: Enable SSH
v2 on Router1 using RSA 1024 bits modulus and domain-name test.com
Router1(config)#ip
domain-name test.com
Router1(config)#crypto key generate rsa
How many bits in the modulus [512]: 1024
Router1(config)#ip ssh version 2
Explanation:
ip domain-name
test.com sets the
domain name. This is required for RSA key generation.
The command crypto key generate rsa generates RSA key pairs used for
SSH encryption. After entering this command, you will be prompted to specify
the modulus size of the RSA key in bits. Enter 1024, which is the required key size.
ip ssh version 2: Enables SSH v2 which is more secure
that version 1.
Task 3: Restrict
access on VTY lines 0-15 to SSH only and secure it with local user
authentication.
VTY lines are used
for remote access to the device. Restricting access to SSH only and securing
with local user authentication means only authenticated users with the correct
credentials can remotely access Router1.
Router1(config)#line
vty 0 15
Router1(config-line)#transport input ssh
Router1(config-line)#login local
Router1(config-line)#exit
line vty 0 15 configures all VTY lines (0-15)
for remote access.
login local configures the VTY lines to use
the local user database for authentication.
transport input ssh restricts remote access to SSH
only
Task 4: Verify SSH
access to Router1 from Router2.
From the Router2,
initiate a SSH session to Router1.
Router2#ssh -l corp 192.168.1.1
Password: support123
Router1#
Now exit
configuration mode and save the configuration.
Router1(config)#end
Router1#write memory
Packet Tracer File
Clicking this button will begin the download of a ZIP file. Inside the ZIP file, you'll find a Packet Tracer Activity (.pka) file, which will automatically track your progress as you configure the network.